
Crafting a café-quality coffee at home can be incredibly rewarding, and mastering milk steaming is key to achieving velvety lattes or frothy cappuccinos. If you’re struggling to create perfect microfoam or want to refine your technique with the Breville Barista Express, this guide will walk you through the essentials. Uncover the brewing precision of the Breville Dual Boiler BES920XL review
Mastering the Steam Wand on the Breville Barista Express
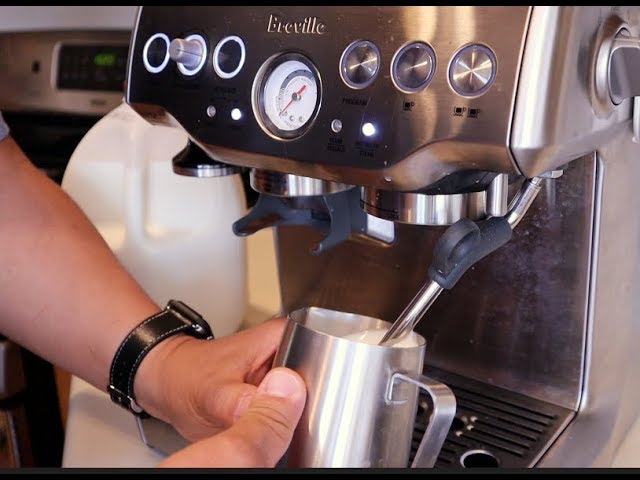
The Breville Barista Express features a versatile steam wand capable of a 360-degree swivel, making it ideal for steaming milk. Before starting, ensure the machine is fully heated—check the indicator lights for readiness. Attempting to steam with a partially heated wand can compromise the texture and quality of your milk foam. Learn how this model blends convenience with innovation in the Breville Barista Touch Impress review
Choosing the Right Milk and Tools
The milk you select plays a crucial role in the final texture. Whole milk produces a rich, creamy foam, while skim milk creates a lighter, airy texture. Plant-based milks like almond, oat, or soy are also viable options but may require adjustments to technique based on their unique compositions. Compare these top models to find your perfect match in the Breville Barista Express Impress vs Pro review
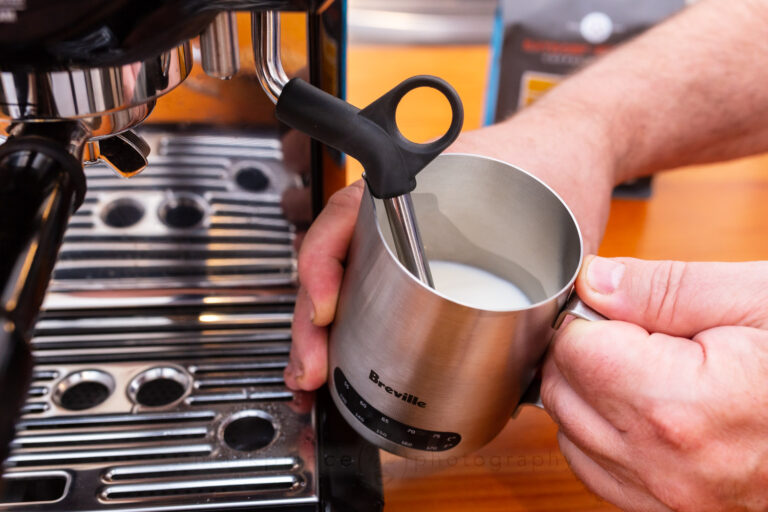
Use a stainless steel milk jug for its excellent heat conductivity and temperature control. A 12-ounce jug is perfect for a single serving, and filling it one-third of the way allows ample room for the milk to expand during steaming. See what makes these machines stand out in the Breville Barista Pro vs Express review
Step-by-Step Guide to Steaming Milk
Purge the Steam Wand
Begin by turning on the steam wand briefly to expel any condensation. This ensures you’re working with dry steam, which is essential for creating smooth microfoam.Position the Steam Wand Correctly
Place the wand just below the milk’s surface, near the spout of the jug, while tilting the jug slightly. This setup helps initiate a whirlpool motion for even texturing.Incorporate Air into the Milk
Turn the steam knob to full power, listening for a gentle hissing sound. Keep the wand near the surface for the first few seconds to introduce air and stretch the milk. Avoid over-aeration, which can lead to large, uneven bubbles.Texture the Milk
Once the milk is stretched, submerge the wand slightly deeper to focus on heating and refining the texture. Maintain the whirlpool motion, breaking down larger bubbles to achieve a smooth, silky finish with a glossy appearance.Monitor Milk Temperature
Check the temperature by touching the jug—stop steaming when it’s too hot to hold comfortably for more than a second (approximately 150°F or 65°C). Use a thermometer for precision, and avoid overheating to preserve milk’s natural sweetness.Shut Off the Steam Wand Properly
Turn off the wand before removing it from the milk to prevent splashes. Carefully remove the wand and set the jug aside to minimize mess.
Polishing Your Milk Texture
Tap and Swirl
After steaming, gently tap the jug on the counter and swirl it to eliminate any remaining bubbles. This step helps achieve the perfect, glossy texture.Clean the Steam Wand
Always wipe the wand with a damp cloth and purge it again immediately after use. Proper cleaning prevents clogging and maintains hygiene.
Pouring and Presenting Your Milk
Tilt your coffee cup and pour the milk steadily into the center, starting from a higher position to mix it with the espresso. Lower the jug as you pour to maintain control, especially when attempting latte art. With practice, you can create designs like hearts, tulips, or more intricate patterns. Explore the key differences between these premium machines in the Breville Oracle vs Oracle Touch review
Pro Tips for Perfecting Milk Steaming
Practice Makes Perfect
Regular practice will help you refine your technique and understand how different types of milk behave.Use Fresh Milk
Fresh milk with high protein content yields the best foam. Ensure it’s not near expiration for optimal results.Experiment with Milk Types
Plant-based barista milks, like oat milk, are great for creating microfoam. Explore different types to find the one that suits your taste.
Common Mistakes to Avoid
Over-Aerating the Milk
Too much air creates coarse bubbles, ruining the texture. Aim for a soft hissing sound when stretching the milk.Overheating the Milk
Avoid exceeding 170°F (77°C), as it can scald the milk, leading to a burnt taste and loss of sweetness.Neglecting Steam Wand Cleaning
Failure to clean the wand can lead to blockages and hygiene issues. Always clean it immediately after use.
Exploring Latte Art
Once you’ve mastered milk steaming, take it to the next level by experimenting with latte art. Start simple with hearts or tulips, progressing to more complex patterns as your confidence grows. Adding your creative touch makes the coffee experience even more enjoyable.

Conclusion: Perfecting Your Milk Steaming Technique
Mastering milk steaming with the Breville Barista Express elevates your home coffee game to café standards. With consistent practice and attention to detail, you can create beautifully textured milk for lattes, cappuccinos, and more.
Whether you’re crafting your daily cup or trying intricate latte art, the effort is well worth it. Fire up your Breville, grab your milk jug, and enjoy the satisfaction of making coffeehouse-quality drinks in your kitchen!